
Running out of tail with eight stitches left is an annoying way to start a project. Pulling out an enormous length avoids that problem, but leaves another: a loose end that seems long enough to knit a second cuff.
For a useful long tail cast-on tail length estimate, make a small sample with your project yarn and needles. Measure the tail yarn used for 10 new stitches, multiply that length by your required stitch count divided by 10, then add an allowance for handling and weaving in. A needle-wrap estimate is quicker; using two yarn supplies avoids estimating a finite tail altogether.
There isn’t one length that works for every 100-stitch cast-on. The yarn, needle size, cast-on technique and your tension all affect the result.
Long-tail cast-on tail length: choose a method
| Method | Useful when | What to watch |
|---|---|---|
| Cast on a small sample and measure its tail yarn | You want an estimate based on the actual materials | Measure only the tail portion, and keep the sample count clear |
| Wrap yarn around the needle | You want a quick starting estimate | Wrap the needle shaft, keep the tension even and allow extra |
| Use two balls or both accessible ends of one ball | You would rather skip tail-length arithmetic | Keep track of the working supply and remove the temporary knot |
These estimate the cast-on tail, not the yarn needed for the whole project. Use the yarn yardage calculator for a separate project estimate.
First, identify the tail and working yarn
In an ordinary long-tail cast-on, the tail ends at the cut end of the yarn. The working strand leads back to the ball. Both supply yarn while you cast on, but they do different jobs.
In the usual slingshot arrangement, the tail goes over the thumb and forms the foundation below the needle; the working yarn goes over the index finger and forms the loops on it. Keep that arrangement consistent while sampling and casting on the project.
Use the intended cast-on needle size. If the pattern specifies a different needle for the edge, sample with that one. The knitting needle size chart can help you check a US, UK or metric label.
Method 1: measure the tail used by a small sample
This approach measures your cast-on rather than guessing from yarn thickness. Holli Yeoh’s illustrated tutorial shows how to hold the beginning and end of the tail portion while unravelling a sample.
For a clearly defined sample:
- Make a starting slipknot, leaving enough tail to work comfortably.
- Cast on 10 new stitches after the knot. You now have 11 loops on the needle: the starting knot plus the 10 sample stitches.
- Hold or mark the tail where it leaves the last new stitch. Keep track of the starting knot too.
- Slide off and unravel those 10 new stitches without losing the two boundaries. Measure the relaxed tail yarn between them. Do not include the working-yarn portion or the unused tail beyond your mark.
- Multiply that length by your target stitch count divided by 10. Add your finishing allowance once, after scaling.
Joyce Jones uses this explicit sample count in the Knitting Guild Association’s Estimating Yarn Tail Length. It prevents a starting knot from quietly changing what “10 stitches” means.
The tail-length formula
Starting tail estimate = measured sample tail × (target stitches ÷ sample stitches) + finishing allowance
Here, the sample count is 10 new stitches. Use the full target count for a slightly conservative estimate, even if the normal retained slipknot will count as one of the project’s stitches. The result remains an estimate, not a promise of zero leftover yarn.
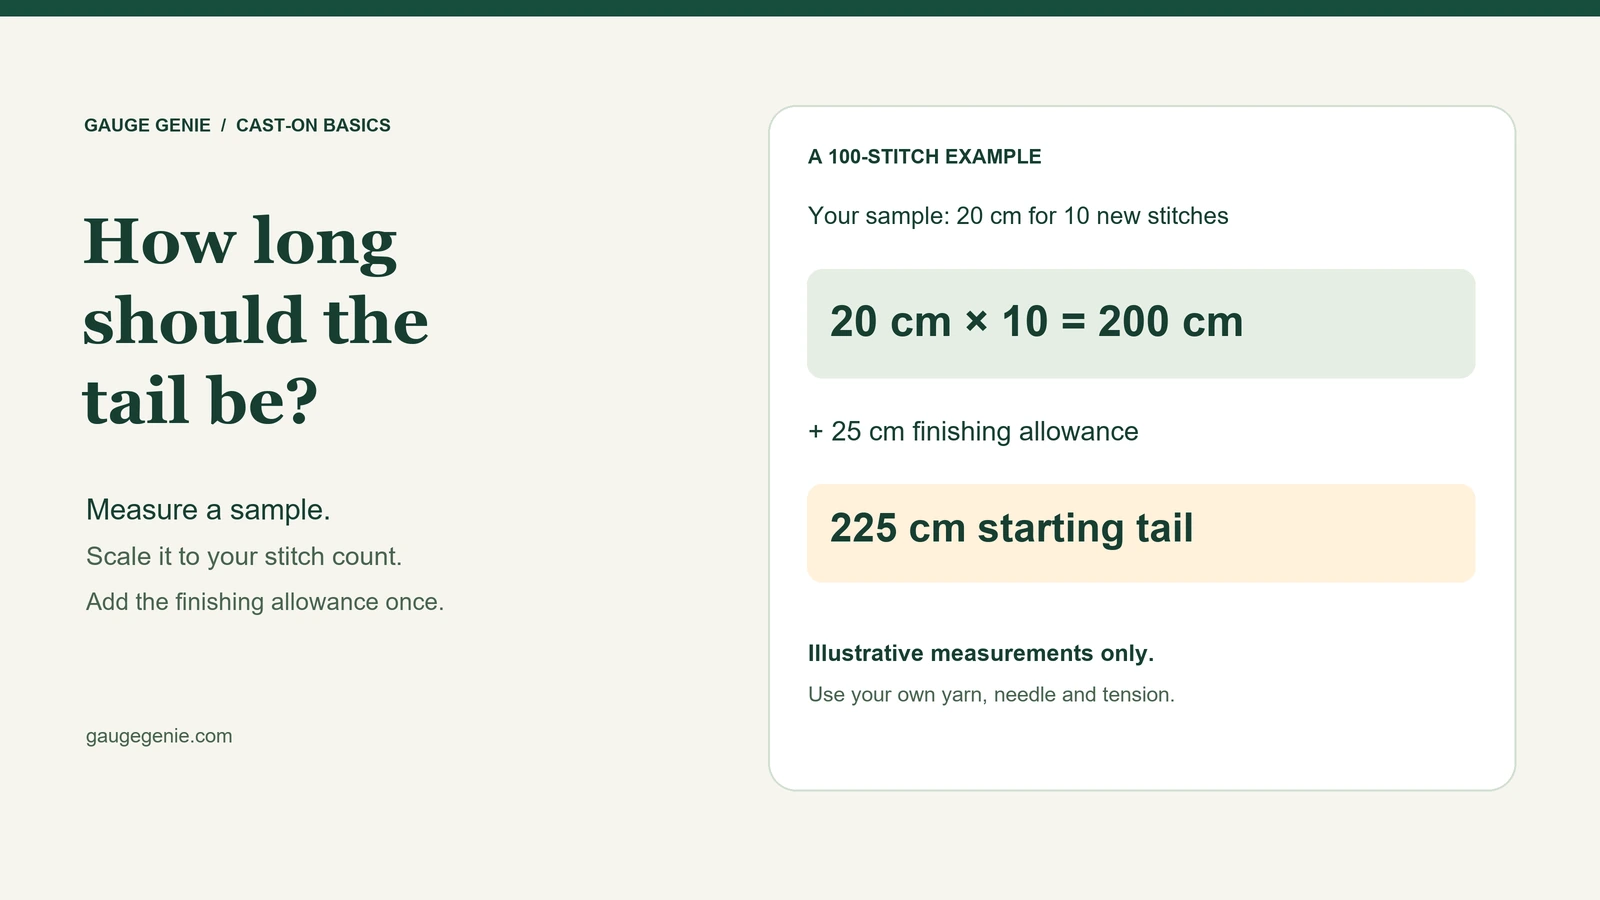
Choose an allowance you can handle and weave in securely. For the worked example below, use 25 cm, approximately 10 inches. Leave more if the project requires a longer seaming tail or your finishing method needs it.
Example: estimating a tail for 100 stitches
Suppose your sample of 10 new stitches uses 20 cm of tail yarn. These are illustrative measurements, not a standard requirement for a particular yarn weight.
For 100 stitches:
- Divide 100 by 10: you need 10 sample lengths.
- Multiply 20 cm by 10: allow 200 cm for the cast-on portion.
- Add the chosen 25 cm finishing allowance: begin with about 225 cm of tail, or approximately 89 inches rounded up.
Using that same hypothetical sample:
| Target stitch count | Scaled tail portion | Starting tail including one 25 cm allowance |
|---|---|---|
| 60 | 120 cm | 145 cm |
| 100 | 200 cm | 225 cm |
| 140 | 280 cm | 305 cm |
Measure your own sample before using this table. If your 10 stitches consume a different length, every result changes.
For 95 stitches, the multiplier is 9.5, not 9. With the same sample, that gives 190 cm plus the allowance: 215 cm. You don’t need to round the stitch count down to a multiple of 10.
Method 2: wrap the yarn around your needle
Wrap yarn around the full-diameter needle shaft 10 times, with even tension. Unwrap it, then measure out enough of those lengths for the target stitch count. Add a finishing allowance at the end.
For 80 stitches, that means eight measured 10-wrap lengths. A circular needle’s thin cable is not the measuring surface: it has a different circumference from the needle tip.
Elizabeth Smith demonstrates the wrap method in small batches. Treat it as an estimate. Tight wraps and loose cast-on stitches can use different amounts of yarn.
For a useful check before measuring a long tail, try casting on 10 stitches with the length you’ve allowed. Patty Lyons recommends checking the wrap estimate this way. If it runs short, revise the estimate before repeating it across the whole stitch count.
Method 3: use two yarn supplies instead
Use two balls of the same project yarn, or the inside and outside ends of one ball if both are accessible. One supply takes the place of the tail; the other becomes the working yarn.
Make a temporary slipknot with both strands and cast on from the two supplies. Count the required actual stitches without counting that temporary knot.
For a piece worked flat, work the real stitches of the first row as the pattern directs, using the intended working strand. When you reach the temporary knot, slip it off and undo it. Then cut only the temporary supply, leaving a suitable end to weave in. Keep the working supply attached and continue with one working strand unless the pattern requires yarn held double.
That sequence is for flat work. For a project joined in the round, follow the designer’s joining setup; the doubled knot still isn’t a project stitch.
Nimble Needles shows the two-strand method. It avoids running out of a premeasured tail, but adds ends to finish. Two feeds from one ball can twist around each other, so pause to untangle them as needed.
Why an estimate can still run short
Changing needles, tightening the sample more than the actual cast-on, or using a different cast-on variation changes the comparison. Sample again when you change the setup rather than carrying over a number from another project.
A second common problem is scaling the wrong length. If you measure both strands together, you’re measuring total sample consumption instead of the tail requirement. If you multiply a sample length that already includes a generous unused end, you multiply that extra end too.
Keep the arithmetic in one unit until the end. For example, scale centimeters and add a centimeter allowance, then convert the total if you want inches. Do not combine a number measured in inches with an allowance entered in centimeters.
If you run short, stop before working the first row and redo the cast-on with a revised length, or use the two-supply method. Don’t pull the remaining stitches much tighter simply to make the yarn reach.
Check the stitch count before the first row
Place markers in convenient counting groups as you work, then recount the loops before starting the pattern. In a conventional long-tail cast-on with a retained single-strand slipknot, that knot counts as one stitch. In the two-supply method above, its temporary doubled knot does not.
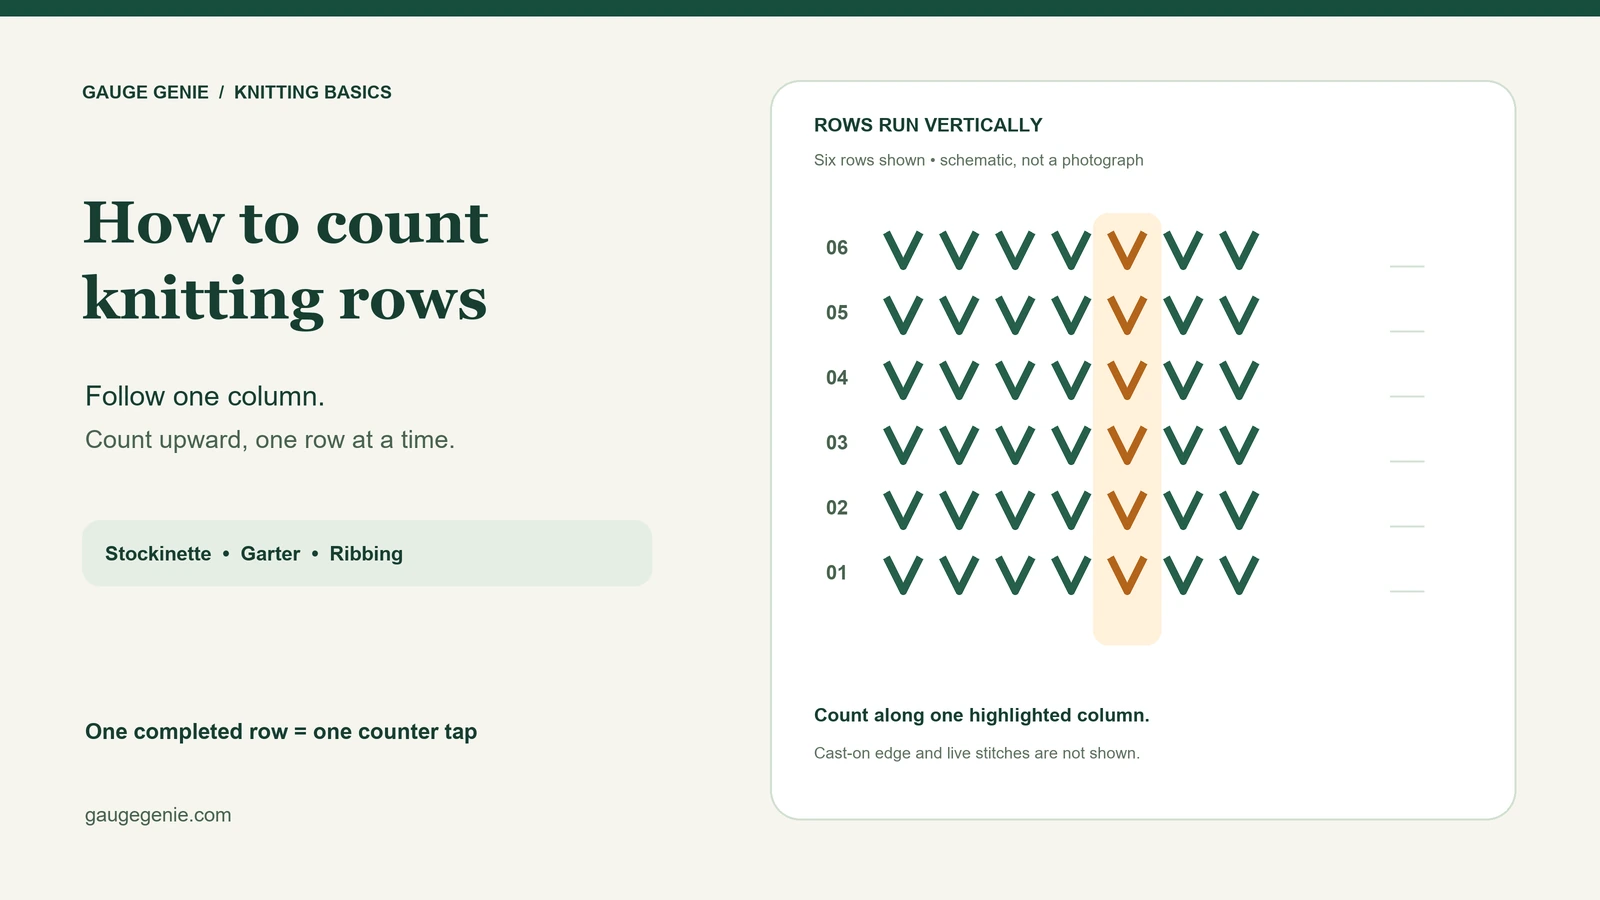
The cast-on stitch count is separate from the number of rows worked. Our guide to counting rows in knitting explains the cast-on boundary and when to record the first completed row.
If you’re choosing your own starting stitch count, work from a measured swatch using the knitting gauge calculator. It helps with stitches for a desired width; it does not measure cast-on tail consumption. Follow the pattern’s stitch multiples, edge stitches and sizing instructions.Before you begin, write down three things: the stitch count, the tail estimate and how you obtained it. That small note makes the next cuff or sleeve much easier to start with the same setup.

[…] starting a new piece, estimate your long-tail cast-on tail length from a small […]