
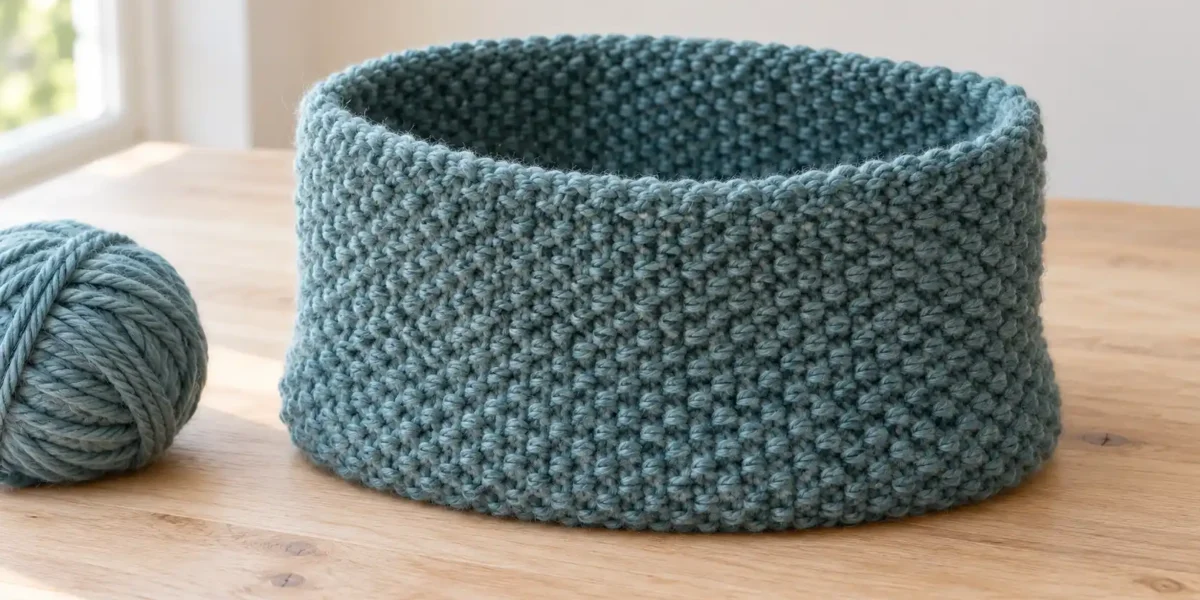
This free seed stitch cowl knitting pattern makes a single-loop neck warmer from one flat rectangle. You knit back and forth on straight needles and sew one vertical seam. There is no joining in the round, no cable needle and no picked-up edging.
The texture comes from alternating knit and purl stitches, then changing their positions on the following row. The pattern includes two circumferences and shows exactly which stitches belong to the seam, so you can choose a comfortable opening without guessing from the cast-on count.
Design note: Stitch counts and sizing calculations have been checked, but this new pattern has not yet been sample knitted. Gauge, fit and yarn allowances need practical confirmation. The featured image is an AI-generated design visualization, not a photograph of a test-knit sample.
Seed stitch cowl knitting pattern at a glance
| Detail | Pattern information |
|---|---|
| Skill level | Easy: knit, purl and a vertical seam |
| Construction | Flat rectangle; side edges joined to form a single loop |
| Yarn | Smooth bulky yarn, Category 5 |
| Starting needle | 6 mm / US 10; adjust to obtain the fabric |
| Reference washed gauge | 14 stitches and 24 rows over 10 cm in seed stitch |
| Target height | 20 cm / about 8 in |
| Target circumferences | 60 or 70 cm / about 23½ or 27½ in after seaming |
The pattern uses US seed stitch, often called moss stitch in UK terminology. Names can vary between references, so follow the written two-row repeat rather than substituting a different stitch with a similar name.
Materials and a comfortable yarn choice
Allow 160 (190) m, about 175 (208) yd, of bulky yarn for the 60 (70) cm cowl. Add approximately 30 m / 33 yd if you will not reuse your gauge swatch. These are planning allowances, not measured consumption from samples.
You also need straight needles long enough to hold the stitches comfortably, a blunt yarn needle, scissors, a tape measure and two removable markers. A circular needle used back and forth is often more comfortable for holding 86 or 100 stitches. It does not change the flat construction.
Choose a yarn that feels pleasant against the neck. A smooth solid colour makes the knit and purl bumps easier to read. A heavily brushed or very uneven yarn can hide that useful feedback. The yarn weight guide explains why the category name is only a starting point; the washed fabric still controls the size.
Choose an opening that goes over your head
This is a pull-on cowl, not a buttoned neck warmer. Check the actual head measurement and how the washed swatch stretches before choosing the smaller circumference. The opening must pass over the head comfortably; do not size it from the neck measurement alone.
| Size | Target finished circumference | Cast on | Work after casting on |
|---|---|---|---|
| Regular | 60 cm / 23.6 in | 86 stitches | 48 rows, or 20 cm high |
| Roomier | 70 cm / 27.6 in | 100 stitches | 48 rows, or 20 cm high |
At the reference gauge, the flat rectangle is about 61.4 (71.4) cm wide before seaming. That includes one edge stitch on each side. The seam is planned to use those two edge columns, leaving 84 (98) stitches around the visible circumference: 84 ÷ 1.4 = 60 cm and 98 ÷ 1.4 = 70 cm.
Real seam take-up and seed-stitch fabric can vary. These are drafting calculations, not measured guarantees. Compare the actual rectangle and an approximately pinned join before sewing it permanently.
Swatch in seed stitch, not stockinette
Cast on 24 stitches and work the two-row repeat below, using 11 knit-purl pairs between the two edge stitches. Make the swatch at least 12 cm tall, wash it according to the yarn label and let it dry without stretching it open.
Measure the central seed-stitch fabric. The reference gauge is 14 stitches and 24 rows in 10 cm, approximately four inches. All size calculations here use centimetres. If the fabric is too open, try a smaller needle; if it is stiff, try a larger one and remeasure.
For a revised circumference, use your washed stitch gauge in the gauge calculator. The seed-stitch section needs an even number of stitches, then add two edge stitches. Do not add a second seam allowance if the calculator already included those edges.
Abbreviations and stitch notes
- k: knit; p: purl.
- st / sts: stitch / stitches.
- RS / WS: right side / wrong side, used only to help track rows.
- BO: bind off, also called cast off.
- Instructions between asterisks are repeated as stated.
Seed stitch looks similar on both sides. The first and last stitch are knitted on every row to make small garter edge columns for seaming. They are not part of the two-stitch seed repeat. Do not slip them.
The Craft Yarn Council abbreviation list is a useful reference for the conventional terms. The specific edge treatment and size counts below belong to this draft.
Full pattern: knit the rectangle
1. Cast on and identify the edges
Cast on 86 (100) stitches for the regular (roomier) size. A starting slipknot counts as one stitch. Keep the cast-on edge comfortable enough to pass over the head later.
Place one removable marker after the first stitch and another before the last stitch if that helps you keep the edges separate from the texture. Do not treat the markers as extra stitches.
2. Work the two-row repeat
Row 1: K1 edge stitch; repeat k1, p1 42 (49) times; k1 edge stitch.
Row 2: K1 edge stitch; repeat p1, k1 42 (49) times; k1 edge stitch.
Repeat Rows 1 and 2 24 times in total to complete 48 knitted rows. The planned height is 20 cm at the reference row gauge. Keep 86 (100) stitches throughout.
Length takes priority if your row gauge differs. Work to the intended height, preferably ending after Row 2 so your notes finish on a complete pair. The stitch counter can track each completed row. Do not count one two-row repeat as only one knitted row.
After several rows, check that the centre has a small alternating bump texture. If you see continuous ribs instead, stop and check which row you are repeating. Working Row 1 on every row with this even interior count would change the fabric.
3. Bind off in the established texture
On the next row, knit or purl each stitch as needed to continue the seed pattern, passing the previous stitch over to bind off. Keep the two edge stitches knit as you reach them. Do not pull the bound-off edge tight.
Leave a tail of about 60 cm / 24 in for the seam and finishing. Before cutting a short tail, check that both the cast-on and bind-off edges have enough give for the chosen opening.
Block and join the side edges
Wash and dry the rectangle as you washed the swatch, following the yarn label. Let it settle flat without stretching it into the table dimensions. The cast-on and bound-off edges will become the lower and upper edges of the cowl; the two row-end sides are the edges you join.
Bring the row-end sides together with no twist and the outside of the cowl facing you. Line up the cast-on corners. Using mattress stitch, pick up corresponding bars just inside the first edge column on one side, then the other. Work upwards a few rows at a time, gently drawing the sewing yarn in so the edge columns turn to the inside.
Keep the seam soft and match rows rather than skipping a group on one side. If the join puckers, loosen it before continuing. Do not overlap a wide section of the rectangle; that would make the circumference smaller than the planned one-column-per-side seam.
Weave in the ends and check the cowl over the head. If it is uncomfortably tight, unseam it and review the circumference and edge stretch. Forcing it on is not a fitting method.
Resize the cowl without losing the texture
At this gauge, adding 14 stitches to the interior adds about 10 cm of circumference. The two edge stitches stay separate. Adding 24 rows adds about 10 cm of height. These relationships apply to the stated washed gauge, not every bulky yarn.
As a worked example, a 65 cm circumference at 1.4 stitches per centimetre gives 91 interior stitches. Choose a nearby even interior count: 90 gives about 64.3 cm; 92 gives about 65.7 cm. Add two edge stitches after choosing. Decide which opening you want instead of silently rounding to an odd count and changing the return-row logic.
The row gauge guide explains why a correct stitch count does not automatically make the height correct. For this plain rectangle, you can usually work to a measured height while keeping the texture repeat intact.
Frequently asked questions
Can I make this cowl on straight needles?
Yes. It is knitted flat and seamed. Use needles that hold the full width comfortably, or a circular needle worked back and forth.
Is seed stitch the same as moss stitch?
The texture called US seed stitch is commonly called moss stitch in the UK. Other patterns use “moss” for a different repeat. Here the alternating two written rows define exactly what to work.
Why did I get ribbing instead of little bumps?
Check the return row. With an even number of interior stitches, Row 2 begins p1, k1 inside the knit edge stitches. Repeating the interior k1, p1 row on both sides would produce ribs instead.
Can I use super bulky yarn?
Not with the same counts and an expectation of the same size. Swatch first, then revise the interior count and height. Super bulky and bulky are different categories; see the yarn weight chart.
Does the smaller size fit every adult?
No. Measure the head and test the opening with your fabric. A cowl has to pass over the head even if it will sit loosely around a much smaller neck.
Record the version you make
Note the washed gauge, chosen count, row total, seam method and actual finished circumference. Add measured yarn use after sample knitting rather than treating a shopping allowance as a test result. More projects will appear in the free knitting pattern library.