
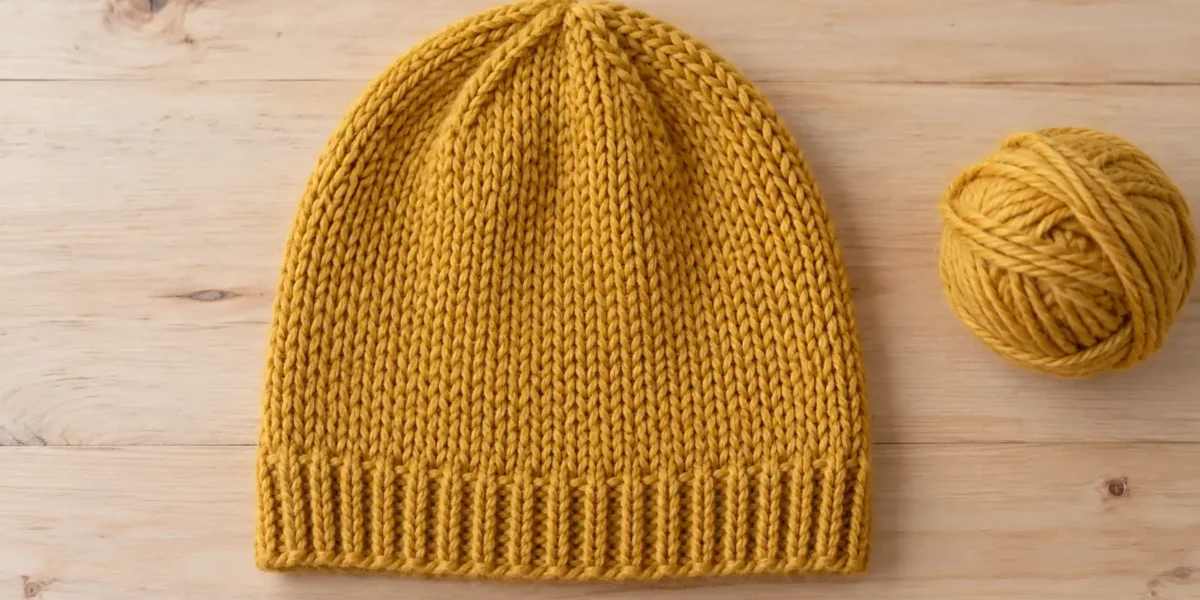
This free This free chunky hat knitting pattern is worked flat, so you can make a beanie without circular knitting or double-pointed needles. Start with a short ribbed brim, work the smooth body, decrease across six crown sections and sew one back seam.
The design has a single, unfolded brim and a little room at the top. Three adult reference sizes are provided. The crown table gives both the knit count inside each repeat and the total stitches remaining, so you can check the shaping instead of hoping the final row works out.
Design note: Stitch counts and sizing calculations have been checked, but this new pattern has not yet been sample knitted. The planned fit, depth and yarn allowances need practical confirmation. The featured image is an AI-generated design visualization, not a photograph of a test-knit sample.
Chunky hat knitting pattern at a glance
| Detail | Pattern information |
|---|---|
| Skill level | Easy, after learning knit, purl and k2tog |
| Construction | Flat rib and stockinette; six-section crown; one back seam |
| Yarn | Smooth bulky yarn, Category 5 |
| Starting needle | 6 mm / US 10; adjust to obtain gauge |
| Reference washed body gauge | 14 stitches and 20 rows over 10 cm in stockinette |
| Brim | 1×1 rib, worn unfolded |
| Reference head measurements | 52, 56 or 60 cm / about 20½, 22 or 23½ in |
Metric measurements control the calculations. Ten centimetres is approximately four inches, and the inch values below are rounded.
Materials and yarn choice
Allow 130 (150, 170) m, approximately 142 (164, 186) yd, of bulky yarn for S (M, L). Add about 25 m / 27 yd if you will not reuse your swatch. These are shopping allowances, not measured sample requirements.
You need straight needles, a blunt yarn needle, scissors, a tape measure, five stitch markers for the crown sections and a removable marker for the right side. A circular needle used back and forth also works; do not join the cast-on into a round.
Choose a smooth yarn with useful stretch and recovery. A soft wool or wool blend is a reasonable starting option. Swatch any substitute, including acrylic, to check the fabric and comfort. A yarn labelled super bulky may produce a much larger hat with these counts; the yarn weight chart helps distinguish the categories.
Measure the head and choose a reference size
Measure around the widest part of the head where the brim will sit. Keep the tape level and comfortable. Compare that measurement with the washed swatch and planned hat circumference rather than choosing from a clothing label.
| Size | Reference head | Planned body circumference after seam | Cast on |
|---|---|---|---|
| S | 52 cm / 20.5 in | 47.1 cm / 18.5 in | 68 stitches |
| M | 56 cm / 22.0 in | 51.4 cm / 20.2 in | 74 stitches |
| L | 60 cm / 23.6 in | 55.7 cm / 21.9 in | 80 stitches |
Each cast-on includes one seam-edge stitch at each side. The planned visible body has 66 (72, 78) stitches. At 1.4 stitches per centimetre, that gives the listed circumferences. The difference from the reference head is intentional negative ease, but comfort depends on the actual fabric’s stretch and recovery.
These are individual reference measurements, not tested ranges guaranteed to fit every head between them. If you are between sizes, compare both neighbouring circumferences and the swatch. For a substantially different size, recalculate the entire crown; do not add arbitrary brim stitches and expect the six sections to remain correct.
Swatch before choosing the final needle
Work a stockinette swatch larger than 10 cm, wash and dry it as you will wash the hat, then measure its centre without stretching. The reference is 14 stitches and 20 rows per 10 cm. Include a short ribbed section to check whether the brim opens comfortably and recovers.
If you have too many stitches in 10 cm, try a larger needle and remeasure. If you have too few, try a smaller needle. Keep the fabric comfortable; do not force a very different yarn into a gauge that makes it unpleasant to wear.
The gauge calculator helps with measurements, and the row gauge mismatch guide explains why stitch fit and crown depth are separate questions. This hat’s crown has a fixed decrease sequence, so a different row gauge changes its depth even if the circumference is right.
Abbreviations and the two edge stitches
- k / p: knit / purl.
- k2tog: knit the next two stitches together as one; decreases one stitch.
- st / sts: stitch / stitches.
- RS / WS: right side / wrong side.
- Instructions between asterisks are repeated as stated.
The first and last stitch are knitted on every row. They form edge columns for sewing and are included in every count. Do not slip them, add extra ones or decrease them during the six-section crown.
The Craft Yarn Council abbreviation list defines the conventional shorthand. The size and crown counts below are specific to this draft.
Full pattern: brim and body
1. Cast on
Cast on 68 (74, 80) stitches for S (M, L), with a comfortably elastic edge. A starting slipknot counts as a stitch. You are working a flat piece, so turn at the end of each row.
2. Work the unfolded ribbed brim
Every brim row: K1 edge stitch; repeat k1, p1 33 (36, 39) times; k1 edge stitch.
Work 8 brim rows in total. The brim is about 4 cm / 1½ in if its row gauge matches the body reference; ribbing may measure differently. It is intended to be worn unfolded, not doubled back into a deep cuff.
3. Knit the body to the crown starting point
Body Row 1, RS: Knit every stitch.
Body Row 2, WS: K1, purl until one stitch remains, k1.
Repeat these two rows until the piece measures 13 cm / about 5 in from the cast-on edge, including the brim. End after a WS row. At the reference row gauge, the body section after the eight-row brim is approximately 18 rows, but the measured total height controls this stage.
Place a removable marker on the smooth knit face if needed. You should still have 68 (74, 80) stitches. The stitch counter can track body rows, then restart its row count for the crown.
Shape the crown in six sections
Read this rule before starting
Every RS decrease row has the same structure:
K1 edge; repeat [knit the table’s number, k2tog] six times; k1 edge.
Every following WS row is: k1, purl to the last stitch, k1. Work that WS row after each decrease row, including the final one. The total stitch count stays unchanged on the WS row.
Place the five markers between the six crown sections as you complete the first decrease row. Slip them when you reach them on later rows; do not count or knit a marker as a stitch. Keep the first and last edge stitch outside the six sections.
Crown table: follow one size column
Each cell below reads plain knit stitches before k2tog / total stitches after the entire decrease row. The total includes both edge stitches. When the plain-knit number is zero, simply work k2tog in each section.
| Decrease row number | S: knit / total | M: knit / total | L: knit / total |
|---|---|---|---|
| 1 | 9 / 62 | 10 / 68 | 11 / 74 |
| 2 | 8 / 56 | 9 / 62 | 10 / 68 |
| 3 | 7 / 50 | 8 / 56 | 9 / 62 |
| 4 | 6 / 44 | 7 / 50 | 8 / 56 |
| 5 | 5 / 38 | 6 / 44 | 7 / 50 |
| 6 | 4 / 32 | 5 / 38 | 6 / 44 |
| 7 | 3 / 26 | 4 / 32 | 5 / 38 |
| 8 | 2 / 20 | 3 / 26 | 4 / 32 |
| 9 | 1 / 14 | 2 / 20 | 3 / 26 |
| 10 | 0 / 8 | 1 / 14 | 2 / 20 |
| 11 | Finished | 0 / 8 | 1 / 14 |
| 12 | Finished | Finished | 0 / 8 |
For example, the first S decrease row is k1, [k9, k2tog] six times, k1. It consumes all 68 stitches and leaves 62. The following WS row keeps 62. The next S decrease row uses k8 before each k2tog and leaves 56.
Continue down your size’s column only until eight stitches remain. The six middle stitches are the reduced crown sections; the other two are the seam edges. S uses 10 decrease rows, M uses 11 and L uses 12. With a WS row after each one, the crown contains 20 (22, 24) knitted rows.
At the reference body row gauge, that adds about 10 (11, 12) cm of depth, giving nominal overall lengths of 23 (24, 25) cm before gathering effects. These are relaxed-beanie drafting proportions, not a close-fitting crown-depth guarantee.
Gather the top and sew the back seam
After the final WS row, cut the yarn leaving about 80 cm / 32 in for gathering and sewing. Do not bind off the eight remaining stitches. Thread the tail through them with the yarn needle, remove them from the knitting needle and draw them together gently.
Bring the two long row-end edges together with the right side outside. Begin just below the gathered crown and work a mattress seam down the back, picking up corresponding bars just inside the outer edge column on each side. Match rows, drawing the seam together in small sections without pulling it rigid.
At the brim, keep the join soft enough to stretch. Secure the top and bottom ends and weave them into the inside fabric. Avoid a hard knot at the crown. Wash and dry the finished hat according to the yarn label, letting it settle rather than stretching it into the planned measurements.
Check the actual fit. If the brim is too tight, review both the cast-on elasticity and the body circumference. A tight edge is not always evidence that every part of the hat needs to be larger.
Changes that need a fresh calculation
You can change the plain body depth before starting the crown if you understand how much depth the crown adds at your row gauge. Do not shorten the hat by stopping the crown early and gathering a large number of stitches; that creates a different top.
For a new circumference at the same construction, choose an even interior count divisible by six, then add two edge stitches. Each section starts with interior count ÷ six stitches. The first decrease row knits two fewer than that section count before its k2tog. The table must then be recalculated, including how many decrease-and-return pairs the new crown requires.
That is why this draft provides three fully specified sizes rather than a vague instruction to cast on “a few more stitches.” Use the needle size chart if the sizes printed on your needles differ from the metric and US labels here.
Frequently asked questions
Can I knit this hat entirely on straight needles?
Yes. Every row is worked back and forth, and the final back seam creates the hat shape. There is no switch to double-pointed needles at the crown.
Does every crown row decrease stitches?
No. The RS rows decrease six stitches each. The intervening WS rows keep the same count. Work the final WS row too, then gather the remaining eight stitches.
What does “0 / 8” mean in the crown table?
Do not knit any plain stitches inside each section: work k2tog six times between the two knitted edge stitches. The whole row ends with eight stitches, including the two edges.
Should I fold the brim?
This version is written for an unfolded brim. A substantial folded cuff needs extra depth before the crown, rather than folding away part of the intended body height.
Can I use super bulky yarn with the same counts?
Only if its washed gauge and fabric actually match, which should not be assumed. A thicker yarn at a looser gauge usually changes the circumference and crown depth. Swatch and recalculate instead of relying on the word “chunky.”
Keep the sample details with the pattern
Record the washed gauge, head measurement, chosen size, pre-crown height and actual finished fit. Add measured yarn use after knitting a sample. Visit the free knitting pattern library for the other projects as they are added. pattern is worked flat, so you can make a beanie without circular knitting or double-pointed needles. Start with a short ribbed brim, work the smooth body, decrease across six crown sections and sew one back seam.
The design has a single, unfolded brim and a little room at the top. Three adult reference sizes are provided. The crown table gives both the knit count inside each repeat and the total stitches remaining, so you can check the shaping instead of hoping the final row works out.
Design note: Stitch counts and sizing calculations have been checked, but this new pattern has not yet been sample knitted. The planned fit, depth and yarn allowances need practical confirmation. The featured image is an AI-generated design visualization, not a photograph of a test-knit sample.
Chunky hat knitting pattern at a glance
| Detail | Pattern information |
|---|---|
| Skill level | Easy, after learning knit, purl and k2tog |
| Construction | Flat rib and stockinette; six-section crown; one back seam |
| Yarn | Smooth bulky yarn, Category 5 |
| Starting needle | 6 mm / US 10; adjust to obtain gauge |
| Reference washed body gauge | 14 stitches and 20 rows over 10 cm in stockinette |
| Brim | 1×1 rib, worn unfolded |
| Reference head measurements | 52, 56 or 60 cm / about 20½, 22 or 23½ in |
Metric measurements control the calculations. Ten centimetres is approximately four inches, and the inch values below are rounded.
Materials and yarn choice
Allow 130 (150, 170) m, approximately 142 (164, 186) yd, of bulky yarn for S (M, L). Add about 25 m / 27 yd if you will not reuse your swatch. These are shopping allowances, not measured sample requirements.
You need straight needles, a blunt yarn needle, scissors, a tape measure, five stitch markers for the crown sections and a removable marker for the right side. A circular needle used back and forth also works; do not join the cast-on into a round.
Choose a smooth yarn with useful stretch and recovery. A soft wool or wool blend is a reasonable starting option. Swatch any substitute, including acrylic, to check the fabric and comfort. A yarn labelled super bulky may produce a much larger hat with these counts; the yarn weight chart helps distinguish the categories.
Measure the head and choose a reference size
Measure around the widest part of the head where the brim will sit. Keep the tape level and comfortable. Compare that measurement with the washed swatch and planned hat circumference rather than choosing from a clothing label.
| Size | Reference head | Planned body circumference after seam | Cast on |
|---|---|---|---|
| S | 52 cm / 20.5 in | 47.1 cm / 18.5 in | 68 stitches |
| M | 56 cm / 22.0 in | 51.4 cm / 20.2 in | 74 stitches |
| L | 60 cm / 23.6 in | 55.7 cm / 21.9 in | 80 stitches |
Each cast-on includes one seam-edge stitch at each side. The planned visible body has 66 (72, 78) stitches. At 1.4 stitches per centimetre, that gives the listed circumferences. The difference from the reference head is intentional negative ease, but comfort depends on the actual fabric’s stretch and recovery.
These are individual reference measurements, not tested ranges guaranteed to fit every head between them. If you are between sizes, compare both neighbouring circumferences and the swatch. For a substantially different size, recalculate the entire crown; do not add arbitrary brim stitches and expect the six sections to remain correct.
Swatch before choosing the final needle
Work a stockinette swatch larger than 10 cm, wash and dry it as you will wash the hat, then measure its centre without stretching. The reference is 14 stitches and 20 rows per 10 cm. Include a short ribbed section to check whether the brim opens comfortably and recovers.
If you have too many stitches in 10 cm, try a larger needle and remeasure. If you have too few, try a smaller needle. Keep the fabric comfortable; do not force a very different yarn into a gauge that makes it unpleasant to wear.
The gauge calculator helps with measurements, and the row gauge mismatch guide explains why stitch fit and crown depth are separate questions. This hat’s crown has a fixed decrease sequence, so a different row gauge changes its depth even if the circumference is right.
Abbreviations and the two edge stitches
- k / p: knit / purl.
- k2tog: knit the next two stitches together as one; decreases one stitch.
- st / sts: stitch / stitches.
- RS / WS: right side / wrong side.
- Instructions between asterisks are repeated as stated.
The first and last stitch are knitted on every row. They form edge columns for sewing and are included in every count. Do not slip them, add extra ones or decrease them during the six-section crown.
The Craft Yarn Council abbreviation list defines the conventional shorthand. The size and crown counts below are specific to this draft.
Full pattern: brim and body
1. Cast on
Cast on 68 (74, 80) stitches for S (M, L), with a comfortably elastic edge. A starting slipknot counts as a stitch. You are working a flat piece, so turn at the end of each row.
2. Work the unfolded ribbed brim
Every brim row: K1 edge stitch; repeat k1, p1 33 (36, 39) times; k1 edge stitch.
Work 8 brim rows in total. The brim is about 4 cm / 1½ in if its row gauge matches the body reference; ribbing may measure differently. It is intended to be worn unfolded, not doubled back into a deep cuff.
3. Knit the body to the crown starting point
Body Row 1, RS: Knit every stitch.
Body Row 2, WS: K1, purl until one stitch remains, k1.
Repeat these two rows until the piece measures 13 cm / about 5 in from the cast-on edge, including the brim. End after a WS row. At the reference row gauge, the body section after the eight-row brim is approximately 18 rows, but the measured total height controls this stage.
Place a removable marker on the smooth knit face if needed. You should still have 68 (74, 80) stitches. The stitch counter can track body rows, then restart its row count for the crown.
Shape the crown in six sections
Read this rule before starting
Every RS decrease row has the same structure:
K1 edge; repeat [knit the table’s number, k2tog] six times; k1 edge.
Every following WS row is: k1, purl to the last stitch, k1. Work that WS row after each decrease row, including the final one. The total stitch count stays unchanged on the WS row.
Place the five markers between the six crown sections as you complete the first decrease row. Slip them when you reach them on later rows; do not count or knit a marker as a stitch. Keep the first and last edge stitch outside the six sections.
Crown table: follow one size column
Each cell below reads plain knit stitches before k2tog / total stitches after the entire decrease row. The total includes both edge stitches. When the plain-knit number is zero, simply work k2tog in each section.
| Decrease row number | S: knit / total | M: knit / total | L: knit / total |
|---|---|---|---|
| 1 | 9 / 62 | 10 / 68 | 11 / 74 |
| 2 | 8 / 56 | 9 / 62 | 10 / 68 |
| 3 | 7 / 50 | 8 / 56 | 9 / 62 |
| 4 | 6 / 44 | 7 / 50 | 8 / 56 |
| 5 | 5 / 38 | 6 / 44 | 7 / 50 |
| 6 | 4 / 32 | 5 / 38 | 6 / 44 |
| 7 | 3 / 26 | 4 / 32 | 5 / 38 |
| 8 | 2 / 20 | 3 / 26 | 4 / 32 |
| 9 | 1 / 14 | 2 / 20 | 3 / 26 |
| 10 | 0 / 8 | 1 / 14 | 2 / 20 |
| 11 | Finished | 0 / 8 | 1 / 14 |
| 12 | Finished | Finished | 0 / 8 |
For example, the first S decrease row is k1, [k9, k2tog] six times, k1. It consumes all 68 stitches and leaves 62. The following WS row keeps 62. The next S decrease row uses k8 before each k2tog and leaves 56.
Continue down your size’s column only until eight stitches remain. The six middle stitches are the reduced crown sections; the other two are the seam edges. S uses 10 decrease rows, M uses 11 and L uses 12. With a WS row after each one, the crown contains 20 (22, 24) knitted rows.
At the reference body row gauge, that adds about 10 (11, 12) cm of depth, giving nominal overall lengths of 23 (24, 25) cm before gathering effects. These are relaxed-beanie drafting proportions, not a close-fitting crown-depth guarantee.
Gather the top and sew the back seam
After the final WS row, cut the yarn leaving about 80 cm / 32 in for gathering and sewing. Do not bind off the eight remaining stitches. Thread the tail through them with the yarn needle, remove them from the knitting needle and draw them together gently.
Bring the two long row-end edges together with the right side outside. Begin just below the gathered crown and work a mattress seam down the back, picking up corresponding bars just inside the outer edge column on each side. Match rows, drawing the seam together in small sections without pulling it rigid.
At the brim, keep the join soft enough to stretch. Secure the top and bottom ends and weave them into the inside fabric. Avoid a hard knot at the crown. Wash and dry the finished hat according to the yarn label, letting it settle rather than stretching it into the planned measurements.
Check the actual fit. If the brim is too tight, review both the cast-on elasticity and the body circumference. A tight edge is not always evidence that every part of the hat needs to be larger.
Changes that need a fresh calculation
You can change the plain body depth before starting the crown if you understand how much depth the crown adds at your row gauge. Do not shorten the hat by stopping the crown early and gathering a large number of stitches; that creates a different top.
For a new circumference at the same construction, choose an even interior count divisible by six, then add two edge stitches. Each section starts with interior count ÷ six stitches. The first decrease row knits two fewer than that section count before its k2tog. The table must then be recalculated, including how many decrease-and-return pairs the new crown requires.
That is why this draft provides three fully specified sizes rather than a vague instruction to cast on “a few more stitches.” Use the needle size chart if the sizes printed on your needles differ from the metric and US labels here.
Frequently asked questions
Can I knit this hat entirely on straight needles?
Yes. Every row is worked back and forth, and the final back seam creates the hat shape. There is no switch to double-pointed needles at the crown.
Does every crown row decrease stitches?
No. The RS rows decrease six stitches each. The intervening WS rows keep the same count. Work the final WS row too, then gather the remaining eight stitches.
What does “0 / 8” mean in the crown table?
Do not knit any plain stitches inside each section: work k2tog six times between the two knitted edge stitches. The whole row ends with eight stitches, including the two edges.
Should I fold the brim?
This version is written for an unfolded brim. A substantial folded cuff needs extra depth before the crown, rather than folding away part of the intended body height.
Can I use super bulky yarn with the same counts?
Only if its washed gauge and fabric actually match, which should not be assumed. A thicker yarn at a looser gauge usually changes the circumference and crown depth. Swatch and recalculate instead of relying on the word “chunky.”
Keep the sample details with the pattern
Record the washed gauge, head measurement, chosen size, pre-crown height and actual finished fit. Add measured yarn use after knitting a sample. Visit the free knitting pattern library for the other projects as they are added.