
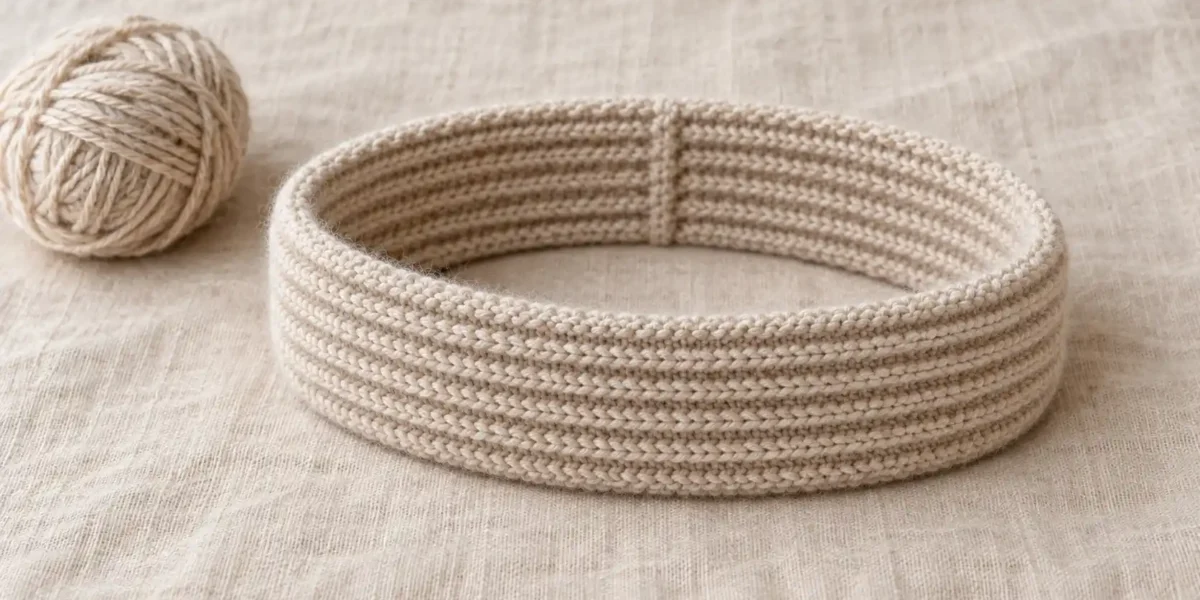
This free ribbed headband knitting pattern is worked flat on straight needles, then joined with one short seam. The design is an untwisted band: no cable, gathered centre or folded twist to work out at the end. Its rib columns follow the strip's length as it grows to fit around your head.
The useful fitting step happens before sewing. You can check the relaxed strip against your own head measurement, make it longer or shorter, and avoid discovering that the finished band slides off.
Design note: Stitch counts and sizing calculations have been checked, but this new pattern has not yet been sample knitted. The dimensions and yarn allowances need practical confirmation. The featured image is an AI-generated design visualization, not a photograph of a test-knit sample.
Ribbed headband knitting pattern at a glance
| Detail | Pattern information |
|---|---|
| Skill level | Easy beginner: knit, purl and a short seam |
| Construction | One ribbed strip, knitted flat and joined without a twist |
| Yarn | Smooth medium-weight yarn, Category 4 |
| Starting needle | 5 mm / US 8; change size to obtain the fabric |
| Reference gauge | 20 stitches and 28 rows over 10 cm in washed, relaxed 1×1 rib |
| Band width | About 9 cm / 3½ in at the reference gauge |
The gauge is measured in ribbing without stretching it open. Do not use the stockinette gauge on a yarn label as though it were the same measurement.
Materials and yarn choice
Allow 75 (85, 95) m, about 82 (93, 104) yd, for the three sizes below. Add about 20 m / 22 yd for an unreused swatch. These are planning allowances, not measured sample requirements. Check the label's length rather than assuming a particular ball weight will be enough.
You also need straight needles, a blunt yarn needle, scissors, a tape measure and two removable markers or safety pins for the fitting check. A circular needle used back and forth is equally suitable; you do not join the stitches in the round.
A smooth wool or wool-blend yarn is a useful starting option for a band that needs to stretch and recover. Soft acrylic can also work if you like its swatch. Cotton often behaves differently under repeated stretching, so test its recovery rather than relying on the same finished length. The beginner's yarn guide explains how to compare fibre choices.
Measure your head and choose a starting length
Measure around the place where the band will sit, passing over the ears if you want ear coverage. Keep the tape comfortably in contact with the head, without pulling it tight.
| Starting size | Reference head measurement | Relaxed strip length before joining | Approximate knit rows |
|---|---|---|---|
| S | 52 cm / 20½ in | 46 cm / 18.1 in | 130 |
| M | 56 cm / 22 in | 50 cm / 19.7 in | 140 |
| L | 60 cm / 23½ in | 54 cm / 21.3 in | 152 |
These are starting points, not rigid age or clothing-size labels. The strip is shorter than the reference head measurement so it stretches into place. How that feels depends on the yarn, ribbing, hair and personal preference. Choose with a tape and a swatch, not a label alone.
Length is the controlling instruction. The row totals are rounded to complete two-row pairs. At 28 rows per 10 cm, 130 rows measure about 46.4 cm and 152 rows about 54.3 cm before edge effects. Stop by the required relaxed length rather than chasing a row total that does not match your fabric.
Swatch the ribbing first
Cast on 24 stitches and work the same knit-one, purl-one rib used below for at least 12 cm. Wash and dry it as you will wash the headband. Let it rest in a relaxed state before measuring the middle 10 cm; do not pin it stretched open.
The reference is 20 stitches and 28 rows per 10 cm. With 18 stitches in the band, the planned width is 9 cm. A tighter rib gauge produces a narrower band. If the fabric is comfortable, you can change the width by choosing another even stitch count.
Use the gauge calculator for the arithmetic, but round the width count to an even number to keep this exact one-row rib repeat. A wash-and-stretch check is still needed to judge recovery; a calculator cannot establish comfort.
Abbreviations and the one-row repeat
- k1: knit one stitch.
- p1: purl one stitch.
- st / sts: stitch / stitches.
- BO: bind off, or cast off.
- 1×1 rib: alternating one knit stitch with one purl stitch.
For an even stitch count worked flat, the row is the same on both sides: repeat k1, p1 across the row. Turn and begin again with k1. There are no additional edge stitches in this pattern, and you do not slip the first stitch.
The conventional shorthand follows the Craft Yarn Council abbreviation list. The even-count condition is important: changing to an odd count would require a different return row to maintain these ribs.
Full pattern: knit and fit the band
1. Cast on
Cast on 18 stitches with a comfortable cast-on. If you use a slipknot, count it as the first stitch. Leave a tail of about 20 cm / 8 in for weaving in later.
2. Work the ribbed strip
Every row: Repeat k1, p1 nine times. Turn. You should still have 18 stitches at the end of every row.
Keep the yarn behind the needles for a knit stitch and bring it between the needle tips to the front for a purl stitch. Moving it over the needle instead can create an unwanted yarn-over and an extra stitch.
Continue until the relaxed strip reaches approximately 46 (50, 54) cm, or the length chosen from your own fit check. If you record rows, use the stitch counter, remembering that one turn means a new row, not a new rib.
3. Check the fit before finishing
With the work safely on the needle or secured on waste yarn, bring the short ends together without twisting the strip. Use removable markers to hold them briefly; do not put a sharp pin against skin. Check that the band reaches around your head with gentle stretch and covers the area you intended.
It should feel secure rather than pull uncomfortably. Add a few rows if it is too tight. If it sits loosely without any stretch, remove rows before binding off. For the most reliable check, wash and dry the strip first, following the swatch method.
4. Bind off in rib
Work the next stitch as it appears in the established pattern, then pass the previous stitch over it to bind off. Continue to the end without tightening the edge. Leave a sewing tail of about 35 cm / 14 in and draw it through the final loop.
5. Join the short ends
Lay the strip flat and check once more that it has no twist. Bring the cast-on and bound-off ends together with the faces you want outside touching each other. Match the knit columns as closely as possible.
Using the long tail, sew small overcast stitches through corresponding edge loops along the two short ends. Catch the edges rather than taking a large bite of the fabric. Keep the seam soft enough to open with the ribbing. Turn the band so the seam lies inside, weave in the ends and check the fit again. A small seam can shorten the usable length slightly.
Change the width without changing the construction
At the reference gauge, 16 stitches give about 8 cm, 18 give about 9 cm and 20 give about 10 cm before edge effects. Use an even count and repeat k1, p1 across every row. The length still comes from the head measurement and fit check.
Changing yarn thickness is a larger change. A chunky yarn with the same 18 stitches may make a much wider band. Compare the washed rib gauge and fabric first; the yarn weight chart can help you identify the starting category.
Troubleshooting
My band has bumps instead of vertical ribs
Count the stitches and read the row. This version needs an even number of stitches and starts each row with k1, p1. If you changed the count to an odd number but kept the same return row, you changed the fabric.
The band loosens after wearing
Check whether the swatch recovers after stretching and resting. A shorter length cannot always compensate for yarn that stays stretched out. Review the fibre and gauge before making another band.
The seam feels hard
Use smaller stitches and avoid pulling the sewing yarn tight. A bulky knot or several layers folded into the seam can be more noticeable than the join itself. Undo the seam and resew if needed.
Frequently asked questions
Do I need circular needles?
No. Straight needles are suitable. You can also use a circular needle to work flat without joining in the round.
Is this a twisted headband?
No. It is deliberately a plain, untwisted band with one seam. Do not add a twist during sewing unless you are changing the design and checking the resulting fit.
Can I make it longer than the table says?
Yes. The table gives starting lengths for three reference head measurements. Work to a comfortable tested length in your washed fabric; keep an even stitch count across the width.
Does “20 stitches over 10 cm” mean stretched ribbing?
No. Measure washed ribbing at rest. Stretching the ribs apart can give a misleadingly low stitch count and change the planned width.
Should I choose a size from a hat size label?
Use the actual head measurement instead. Hat labels and clothing sizes vary, and this band's stretch needs to be checked with the yarn you chose.
Make a note for the next one
Record the yarn, needle size, relaxed width and length before joining, and the finished fit. That is more useful than relying on the approximate row count alone. Browse the free knitting pattern library for other small projects as they are added.